
Landing gear is not just for airplanes. FPV quad pilots who fly from rough surfaces — gravel, concrete, wet grass, or rocky terrain — know that landing directly on the frame or battery can cause serious damage over time. A set of well-designed 3D printed landing skids protects your expensive electronics, keeps your battery off wet ground, and adds style to your build. Best of all, they cost pennies to print and take only an hour or two.
Why Use Landing Gear on a Quad?
The bottom plate of an FPV frame takes abuse every landing. Carbon fiber is strong, but repeated impacts on sharp gravel create micro-cracks that eventually lead to delamination. Your battery, strapped to the bottom or top, is even more vulnerable — a puncture from a sharp rock can cause a catastrophic LiPo fire. Landing skids create a sacrificial buffer zone between your quad and the ground, absorbing impact energy and keeping everything elevated above moisture and debris.
Design Types Compared
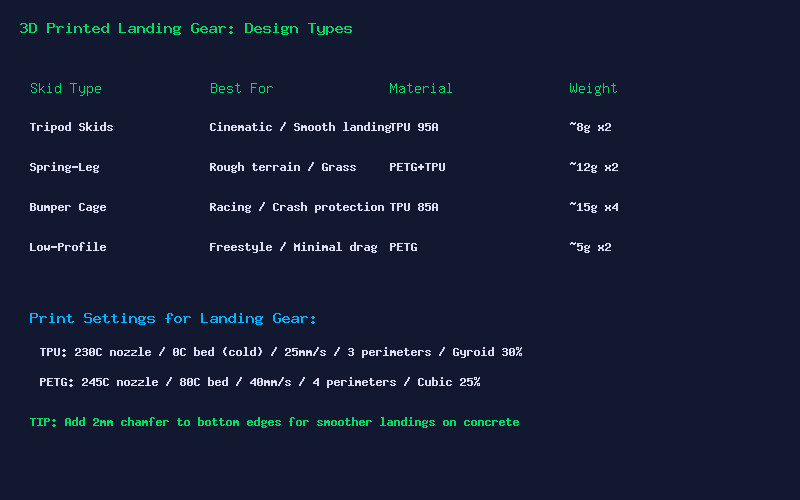
Tripod Skids: Two angled legs that mount under the front arms, plus a tail skid under the rear. This gives a stable three-point stance and works beautifully for cinematic flying where smooth takeoffs and landings matter. Print in TPU 95A for flexibility. Total weight: about 8g per pair.
Spring-Leg Design: A two-part design with a rigid PETG upper mount and a TPU coil-spring lower leg. The spring compresses on hard landings and rebounds slowly, preventing bounce. Ideal for rough terrain and bando flying where landings are rarely gentle. About 12g per pair but worth every gram on concrete.
Bumper Cages: A wrap-around TPU cage that mounts at the motor bolts and extends down 15-20mm below the frame. This doubles as both landing gear and propeller protection for tight proximity flying. The downside is weight — around 15g for all four corners — and slightly increased drag. Best for racing gates and indoor flying.
Low-Profile Skids: Minimalist PETG sliders that add only 5mm of clearance and 5g total. They do not change how the quad flies at all. Ideal for freestyle pilots who mostly land on grass but want a little protection for the occasional gravel patch.
Designing Your Own Skids
Start by measuring the thickness and width of your frame arms at the motor mounting area. The skid should clamp onto the arm using the existing motor bolts — no additional hardware needed. Design a U-shaped channel that fits snugly over the arm, with through-holes aligned to your motor bolt pattern (typically 12x12mm or 16x16mm for M2 or M3 bolts).
Extend the leg downward 15-25mm below the lowest point of your frame. Add a 2mm chamfer to the bottom edge — this prevents the skid from catching on rough surfaces and makes landings smoother. For TPU parts, add fillets to all internal corners to prevent tear propagation at stress points.
Print Settings That Work
TPU 95A: Nozzle 230°C, bed 0°C (cold) or 30°C with glue stick barrier, 25mm/s uniform speed, 3 perimeters, 30% gyroid infill, disable retraction entirely. TPU absorbs impact beautifully and grips the arm without slipping.
PETG: Nozzle 245°C, bed 80°C, 40mm/s, 4 perimeters, 25% cubic infill. PETG is more rigid and slides better on concrete, but transmits more shock to the frame on hard landings.
Testing and Iteration
Print a test pair, install them, and do five intentional hard landings from 1 meter onto concrete. Inspect for cracks, deformation, or screws loosening. If the skids survive without damage and the quad lands without bouncing, you have a winner. If they crack, increase perimeters to 5 and switch to a softer TPU (85A).
Landing skids are one of the simplest and most satisfying 3D printed upgrades you can make to your quad. They protect your investment and let you fly from surfaces you would otherwise avoid. Print a set this weekend.