
Introduction
One of the best uses of a 3D printer in the FPV hobby is producing custom GoPro and action camera mounts. A well-designed TPU mount costs pennies in filament, absorbs vibrations that cause jello in HD footage, and can be tailored to your exact frame and camera angle. This step-by-step guide shows you how to design, print, and optimize your own mounts.
Why Print Your Own Mounts?
Commercial GoPro mounts cost 0-5 each and often do not fit non-standard frames perfectly. With a 3D printer, you can:
- Set your exact preferred camera angle (15, 20, 25, 30 degrees)
- Design around your specific frame geometry and standoff spacing
- Add integrated ND filter holders and lens protection
- Replace a broken mount in 2 hours instead of waiting for shipping
- Experiment with soft-mounting to reduce jello
Material Choice: Why TPU is Essential
Use TPU (Shore 95A) exclusively for camera mounts. The flexibility serves multiple purposes: it grips the camera securely without hardware, absorbs high-frequency motor vibrations before they reach the camera sensor, and survives crashes that would snap a rigid PLA or PETG mount. Overture High Speed TPU and Sainsmart TPU are popular choices that print reliably on most direct-drive printers.
Design Considerations
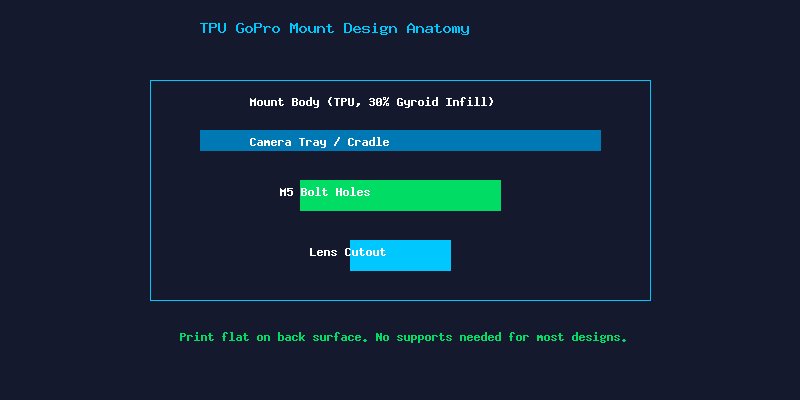
Camera Fit and Retention
Design the cradle with a 0.3-0.5mm interference fit for the camera body. TPU flexibility lets you press the camera in securely without straps or screws. Add a small retaining lip at the top to prevent ejection during crashes. For GoPro Session-style cameras, include a rear wedge that locks into the USB port area.
Vibration Isolation
Soft-mount the entire assembly using M3 silicone grommets between the mount and frame standoffs. This creates a mechanical low-pass filter that dramatically reduces jello in footage. Some designers incorporate TPU flexure arms directly into the mount design for integrated vibration dampening.
Weight Optimization
A GoPro Hero 12 weighs about 155g nearly as much as some 5-inch frames. Keep your mount under 25g by using 2-3mm wall thickness and 20-30% gyroid infill. Every gram saved on the mount is a gram that can go toward flight time.
Print Settings for Perfect Mounts
- Nozzle Temperature: 225-235C for most TPU brands
- Bed Temperature: 40-50C on textured PEI sheet
- Print Speed: 20-30mm/s for all features. Slower perimeters improve layer adhesion.
- Retraction: 1-2mm at 25mm/s. Too much retraction causes TPU to jam in the extruder.
- Cooling: 10-20% fan after layer 3. Too much cooling weakens layer bonds.
- Infill: 30% gyroid for crush resistance without excessive weight.
- Walls: 3-4 perimeters for durability.
Recommended Designs to Start From
Rather than designing from scratch, remix proven open-source mounts. Search Thingiverse and Printables for “FPV GoPro TPU mount” — popular designs include the Brain3D Session mount, the Sbang GoPro adapter, and various frame-specific mounts for the ImpulseRC Apex, GEPRC Mark5, and iFlight Nazgul. Import the STL into Fusion 360 or Tinkercad and modify dimensions to match your setup.
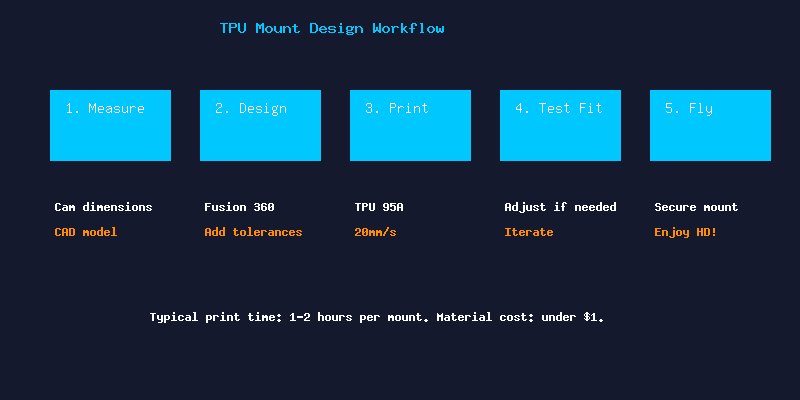
Testing and Iteration
Your first print will rarely be perfect. Print a draft in cheap TPU, test-fit on the frame, note interference points, adjust the CAD model, and reprint. Most designs converge within 2-3 iterations. Once dialed in, print a final version in a color that matches your build.
Conclusion
3D printed TPU GoPro mounts are one of the highest-value applications of additive manufacturing in FPV. For less than in materials and an hour of print time, you get a perfectly fitted, vibration-dampening mount that outperforms most commercial alternatives. Start with a proven design, customize it for your frame, and enjoy jello-free HD footage.